Create and edit catalog instances
Once a catalog specification exists for an entity, like an application, build, or namespace, you can start adding actual values to it. These values are known as catalog instances.
A catalog instance is a structured set of data that:
- Follows the rules defined in the catalog spec (JSON Schema)
- Is attached to a specific entity (e.g., a particular application)
- Can be created and edited from the UI, API, or CLI
When is an instance created?
Catalog instances are created in one of two moments:
-
During entity creation
If a spec exists for that entity type, nullplatform automatically renders a form so users can fill in the catalog on the spot. -
Later, in the entity’s dashboard
After creation, the catalog appears in the catalog section of the entity. Click "Show all" to view or edit all fields from the associated specs.
💡 This UI-based flow is available for
application,build, andnamespace.
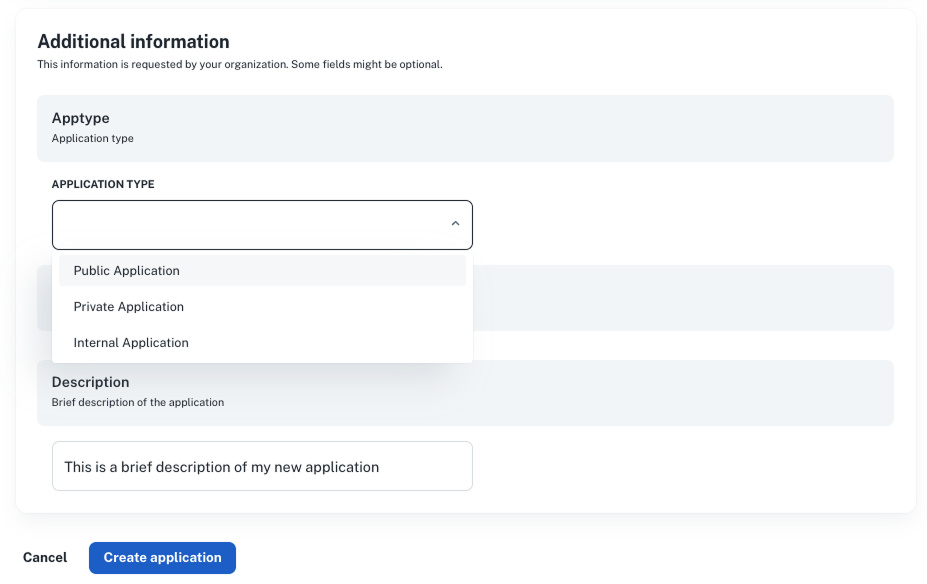
Example: catalog in the application dashboard
When a developer creates a new application, nullplatform will:
- Detect available catalog specs for
application - Render a form for fields like
application_type,description, or any other item - Let the user fill them out and save
Later, on the application detail page:
- Each catalog spec appears as a box in the right sidebar
- Clicking “Show all” opens a modal where the fields can be edited
Example:
- “Apptype” → dropdown rendered from enum values
- “Description” → freeform string field
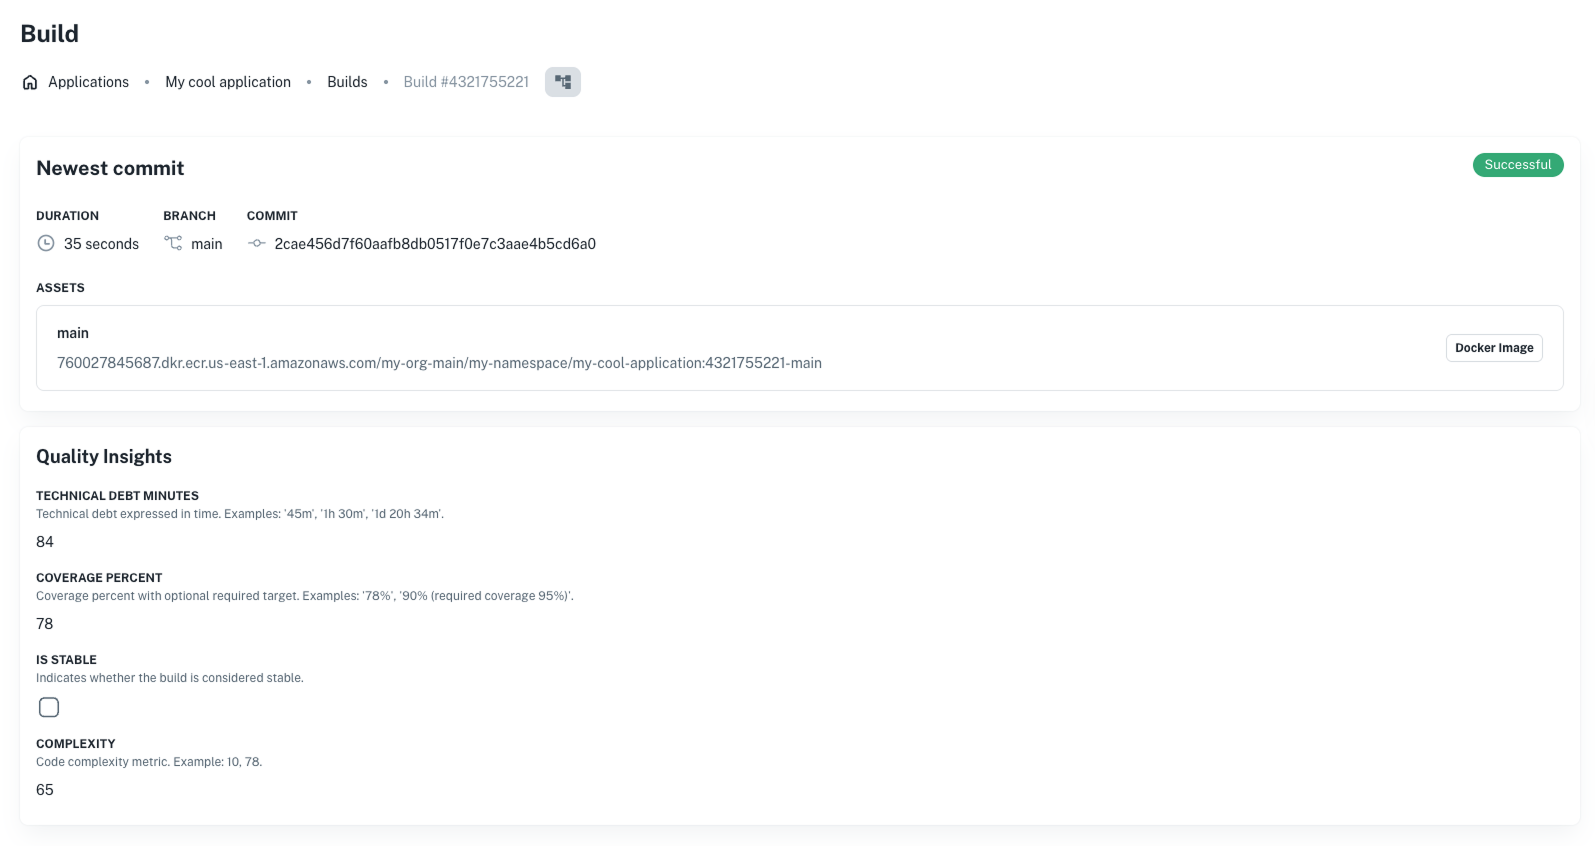
Example: build catalog via quality insights
For builds, the catalog shows up as part of the Quality Insights section:
{
  "quality_insights": {
    "coverage_percent": 78,
    "technical_debt_minutes": 84,
    "complexity": 65,
    "vulnerabilities": 3
  }
}
Each of these fields is defined in the catalog spec, and:
- Is rendered automatically in the build UI
- Can be edited (if
visibleOnincludesupdate) - Can also be synced from CI pipelines using the API
Example:
Creating instances via the API
If you're integrating with CI/CD or automating catalog population, you can use the API to create or update catalog data directly using either the Catalog instance (multiple keys) API or the Catalog instance (single key) API.
Multiple keys (batch creation)
Use this approach when you want to send data for several metadata keys at once. This is ideal for creating or updating all catalog values for an entity in a single request.
- CLI
- cURL
np metadata create
--id :id
--entity build
--body '{
 "coverage": {
     "percent": "95",
     "report": "https://reports.my-organization.com/coverage/build-a82c3d45-19e6-4f2b-b7d0-63f9a1842c1e.html"
 },
 "vulnerabilities": {
     "high": 0,
     "medium": 0,
     "low": 2,
     "report": "https://reports.my-organization.com/vulnerabilities/build-d4e5f678-2a31-4c89-9b01-ef45d32a7b90.html"
 }
}'
curl -L -X POST 'https://api.nullplatform.com/metadata/build/:id' \
-H 'Content-Type: application/json' \
-H 'Authorization: Bearer <token>' \
-d '{
 "coverage": {
 "percent": "95",
 "report": "https://reports.my-organization.com/coverage/build-f1b4be69-1147-4870-a35b-6e718b029f80.html"
 },
 "vulnerabilities": {
     "high": 0,
     "medium": 0,
     "low": 2,
     "report": "https://reports.my-organization.com/vulnerabilities/build-f1b4be69-1147-4870-a35b-6e718b029f80.html"
 }
}'
Single key
Use this approach when you only need to create or update one metadata key for an entity. This is best for fine-grained updates where only one catalog value changes.
To send data for a single catalog key (e.g., "apptype"), use the Create catalog instance (single key) API:
curl -L -X POST 'https://api.nullplatform.com/metadata/build/:id/coverage' \
-H 'Content-Type: application/json' \
-H 'Authorization: Bearer <token>' \
-d '{
   "application_type": "internal"
}'
Reading instances
To fetch all catalog data for a given entity, use the Read catalog instance (all keys) API:
- CLI
- cURL
np metadata read
--id :id
--entity build
curl -L 'https://api.nullplatform.com/metadata/build/:id' \
-H 'Authorization: Bearer <token>'
This returns a complete view of the entity's catalog data, enriched with schema and tag information.
Catalog data validation
Whether filled in via the UI or API, catalog data is always validated against the JSON Schema defined in the catalog specification. Validation rules include:
- Required fields (
required) - Enum values
- Field type matching (
string,number, etc.) - Disallowing extra fields (
additionalProperties: false)
If validation fails, the platform will return an error detailing which parts of the input didn't match the spec.